create a network file as in 3. with the suffix .nwk11
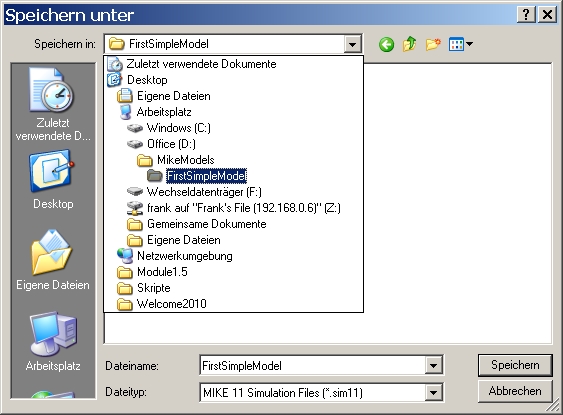
save the network file as in 4. in your folder
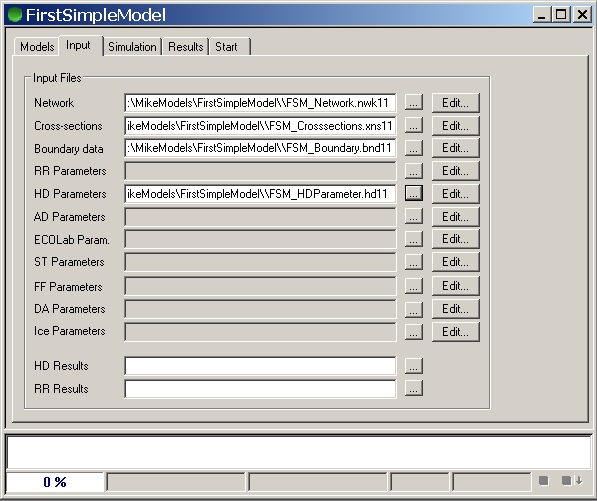
link it to your simulation file (... button)
create a cross-section file as in 3. with the suffix .xns11
save the cross-section file as in 4. in your folder
link it to your simulation file (... button)
create a boundary data file as in 3. with the suffix .bnd11
save the boundary data file as in 4. in your folder
link it to your simulation file (... button)
create a hydrodynmaic data (HD) file as in 3. with the suffix .hd11
save the hydrodynmaic data file as in 4. in your folder
link it to your simulation file (... button)
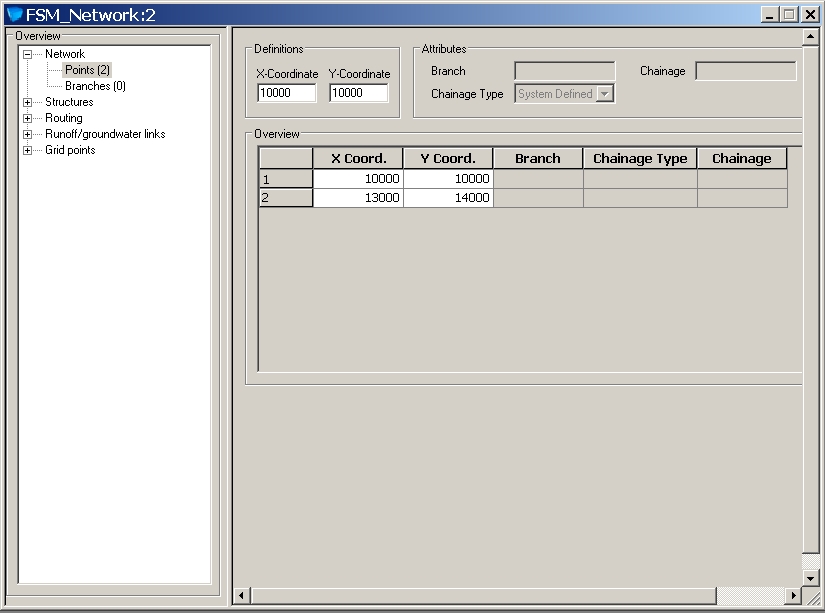
change to "Tabular View" (item under menu View)
open Network and Points
create two points with a distance of 5000
maybe update the workspace area (item under Network)
open graphical view
create a branch by "Define Branch" pencil
change the TopoID and maximum dx value (250m) in the tabular view
don't forget to save your network file
 workspace area:
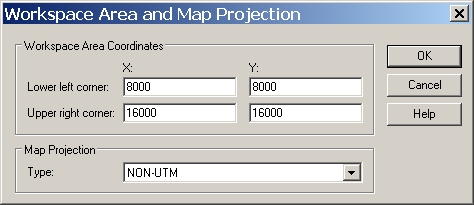 graphical editor: branch:
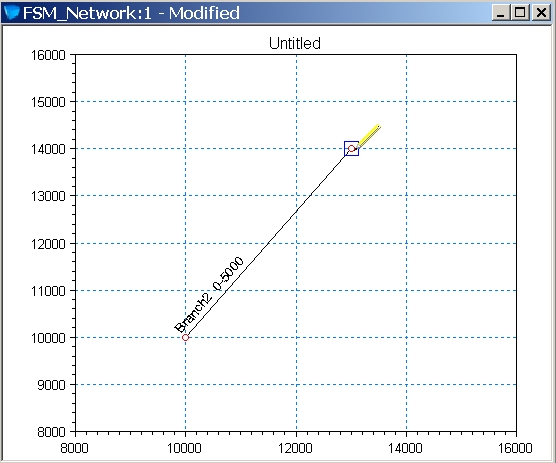 branch form:
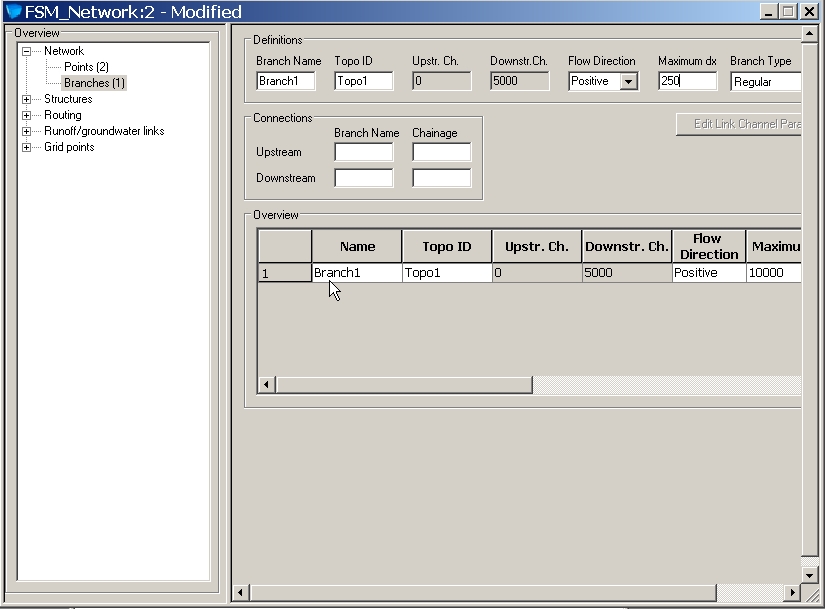
insert two crossections at your river branch with the TopoID at chainage 0 or 5000
this can be also done with the graphical editor of the network
edit the crossection geometry to a rectangular shape of 50 m and 10 m depth
 cross-section editor:
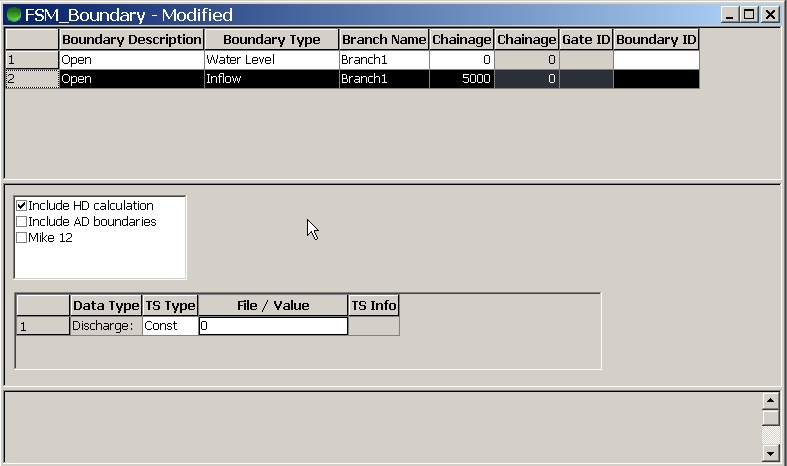
insert two boundary to your river branch with the TopoID at chainage 0 or 5000
choose at chainage 5000 the boundary type on "Inflow"
and TS Tyoe "Const" with q=0 (s kind of vertical wall)
choose at chainage 0 the boundary type on "Water Level"
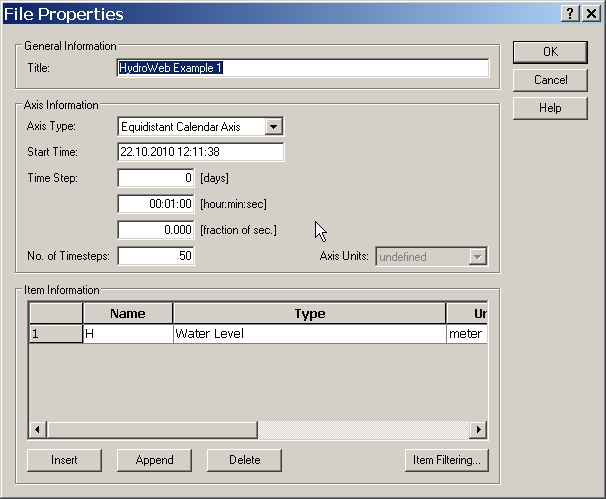
create a new time series file (Product Type MikeZERO) with suffix .dsf0
choose blank time series time
change the time step to 1 min
and the number of time steps to 50
Item information: choose a name (H) and as "Type" "water level"
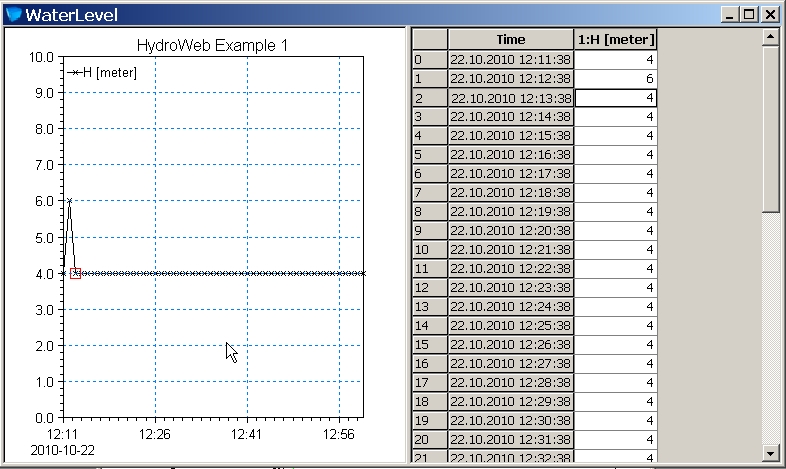
edit the table with the values of the twater level - such as 4 m for all
to generate a kind of "wave", change the 2nd value to 6m
save the time series file in your folder
select the time series file and the item H in the boudary file for the water level boundary condition
save the boundary file
time series file:
 time series data:
 link to boundary:

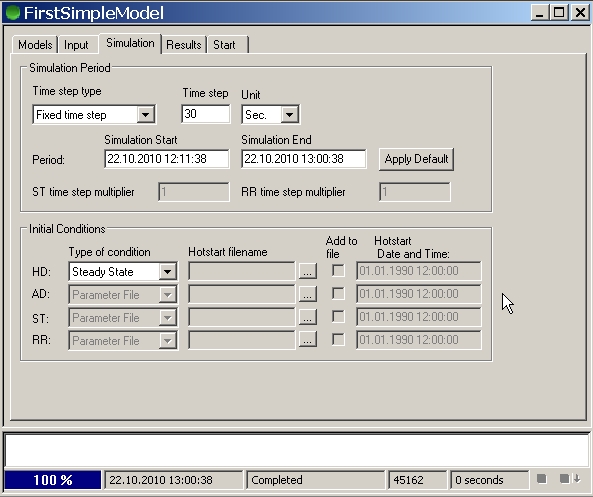
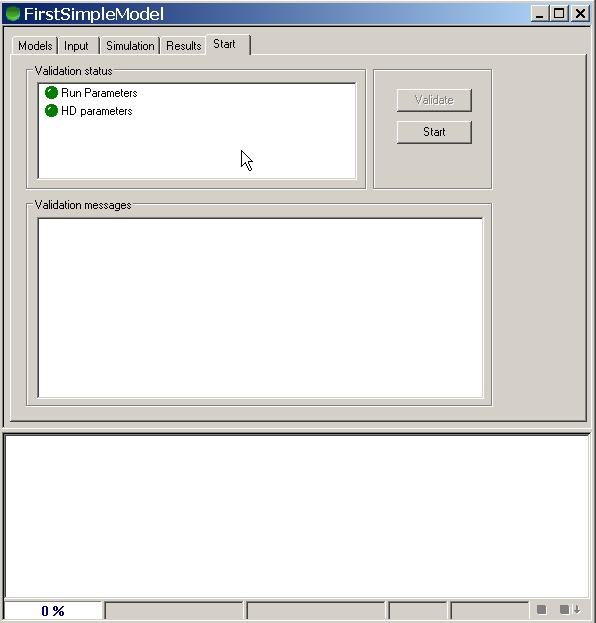
click on "Apply Default" to update the possible time window for our simulation
change the Time step to 10 or 30 sec
save the simulation file
hopefully you see no warnings or error
you can start the simulation
otherwise you have to check the messages and edit your model
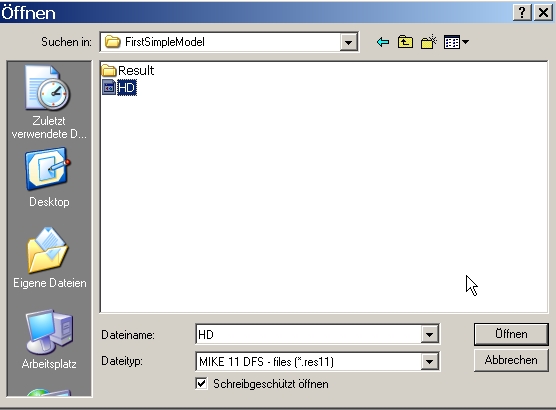
start MikeView from the Programm Menu (Mike by DHI -> MIKEV View -> MIKEView
open the result file default: change the suffix selection to *.res11
the default name for the results is HD.res11
for the next form - just agree by okay
you will get a graphical view of your branch
click in the Menu on Plot -> Longitudal Profile (or the same small Icon)
click on your branch (green selection color) and close the selection by another mousec lick
you will see the profile with the results
use the animation buttons
 Data selection:
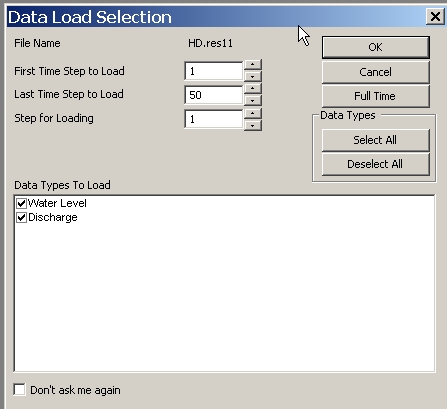 Branch selection:
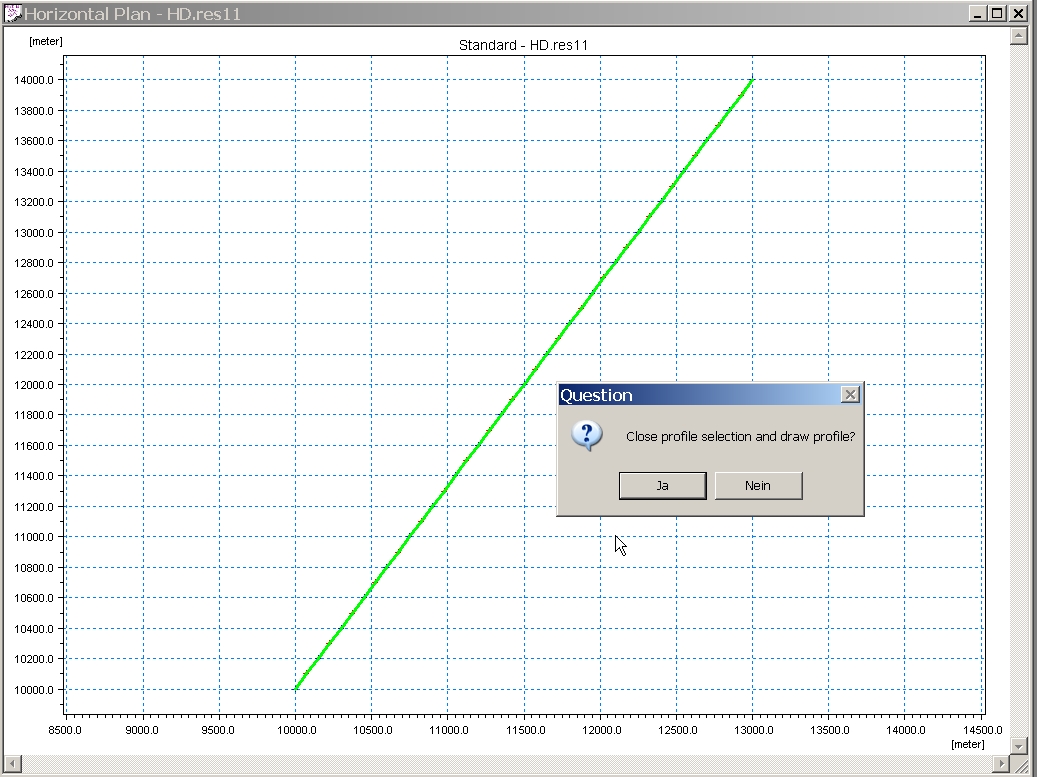 Profile result view:
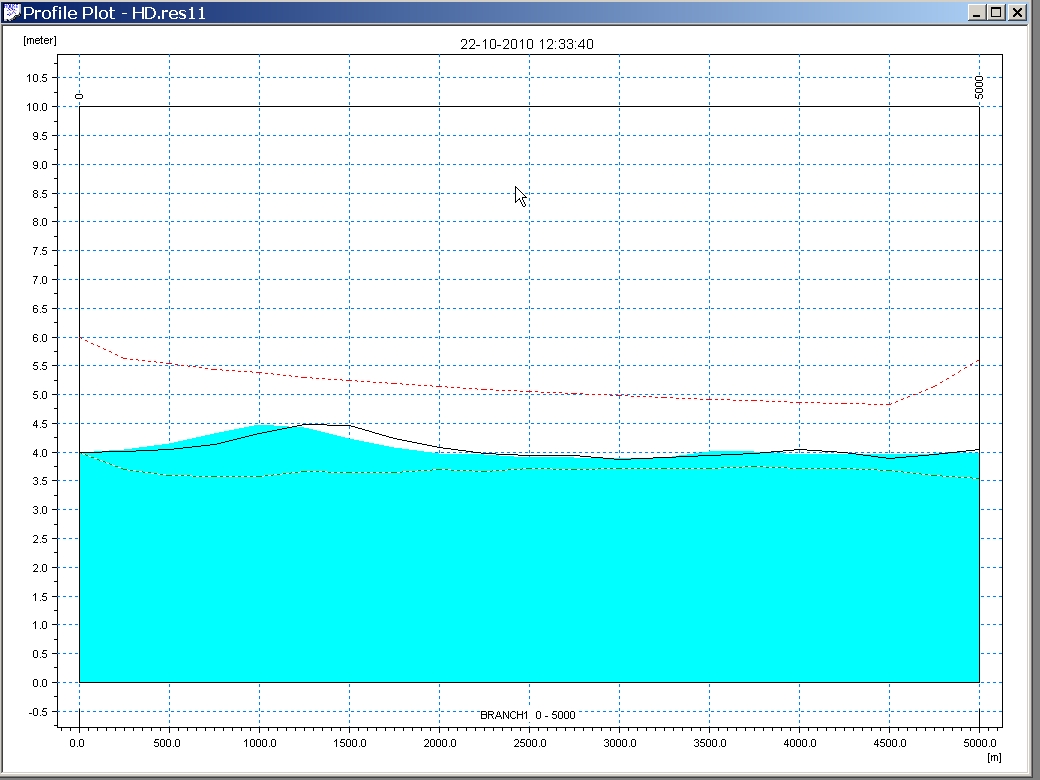
the speed of a wave is sqrt(g*h)
the time to run 5000 m is 5000 / sqrt(g*h)
for 4 m this is 5000 / sqrt(9.81*4) = 798 sec = 13,3 min